
Video BG Changer & Editor: Step-by-Step Guide
Turn a park walk into an illustrated island adventure with Video BG Changer & Editor. Follow the video, background and character references, and example prompts.
Use Video BG Changer & Editor to change an existing video's setting, character, and visual style with text and reference images. In this example, a person walking through a park becomes an illustrated young explorer walking toward a tropical bay.
See the original video and edited result
Both examples autoplay silently and loop. Original video shows the live-action park walk; Edited result shows the island scene and illustrated character. Compare the walking direction, movement, and environment. Pause or scrub through either clip to inspect the details.
Original video
Edited result
Use the prompts below as starting points for a similar edit, adjusting them to your footage and references. Review the generated result for changes in movement and detail.
1. Open Video BG Changer & Editor and upload your clip
Open the video editing workspace and select Video BG Changer & Editor. Add your source under 1. Upload the source video. This example starts with a four-second shot of a person walking away from the camera along a park path.
The workspace accepts MP4 or MOV videos at 23–60 FPS:
| Requirement | Accepted input |
|---|---|
| Video length | 3–15 seconds |
| File type | MP4 or MOV |
| File size | Up to 200 MB |
| Dimensions | Width and height each between 720 and 3,840 pixels |
The WebM videos embedded here are playback previews. For an edit, upload the original MP4 or another source that meets these requirements. Wait for the upload to finish before continuing.
2. Add the island background and explorer references
The tropical bay image guides the environment and its illustrated look. The frontal and side/back views describe the same explorer, including his goggles, clothes, backpack, and equipment.
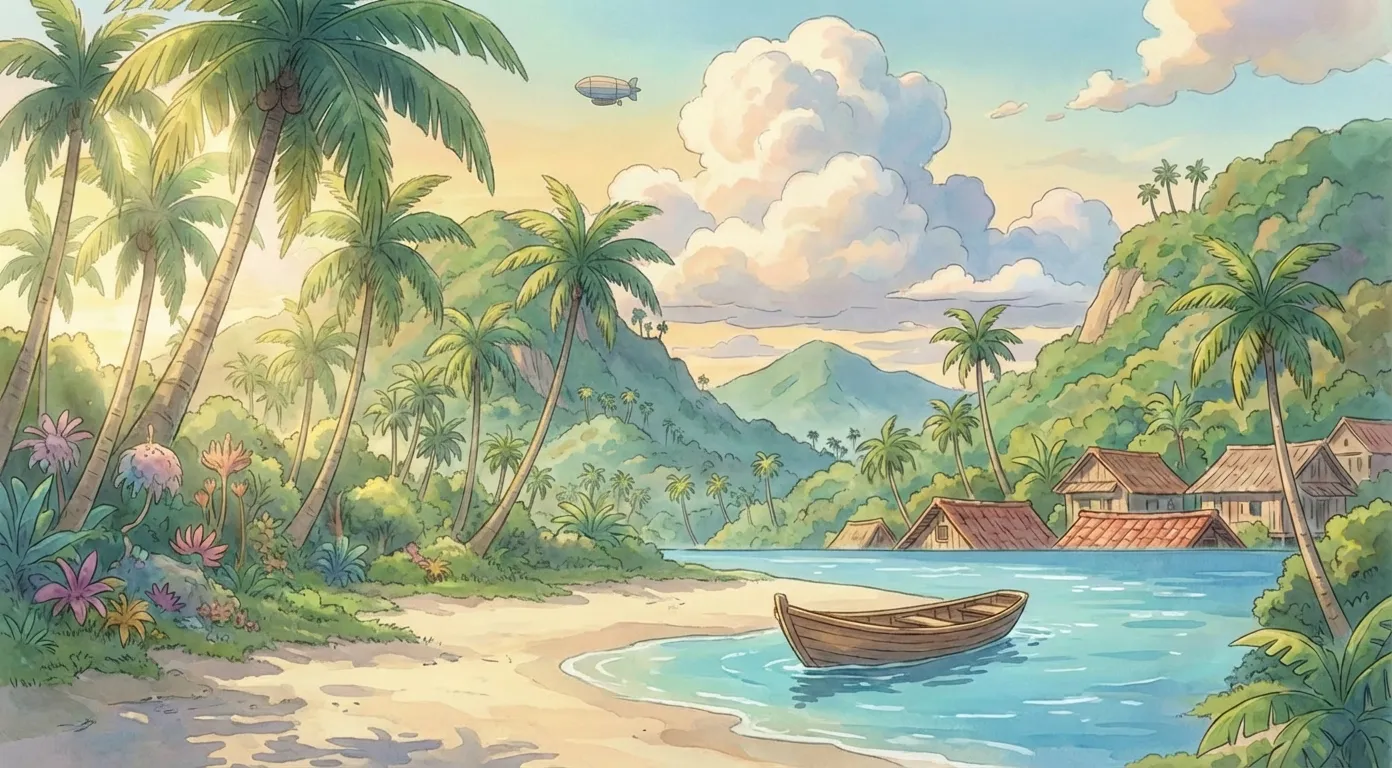
@Image1Tropical bay · background reference
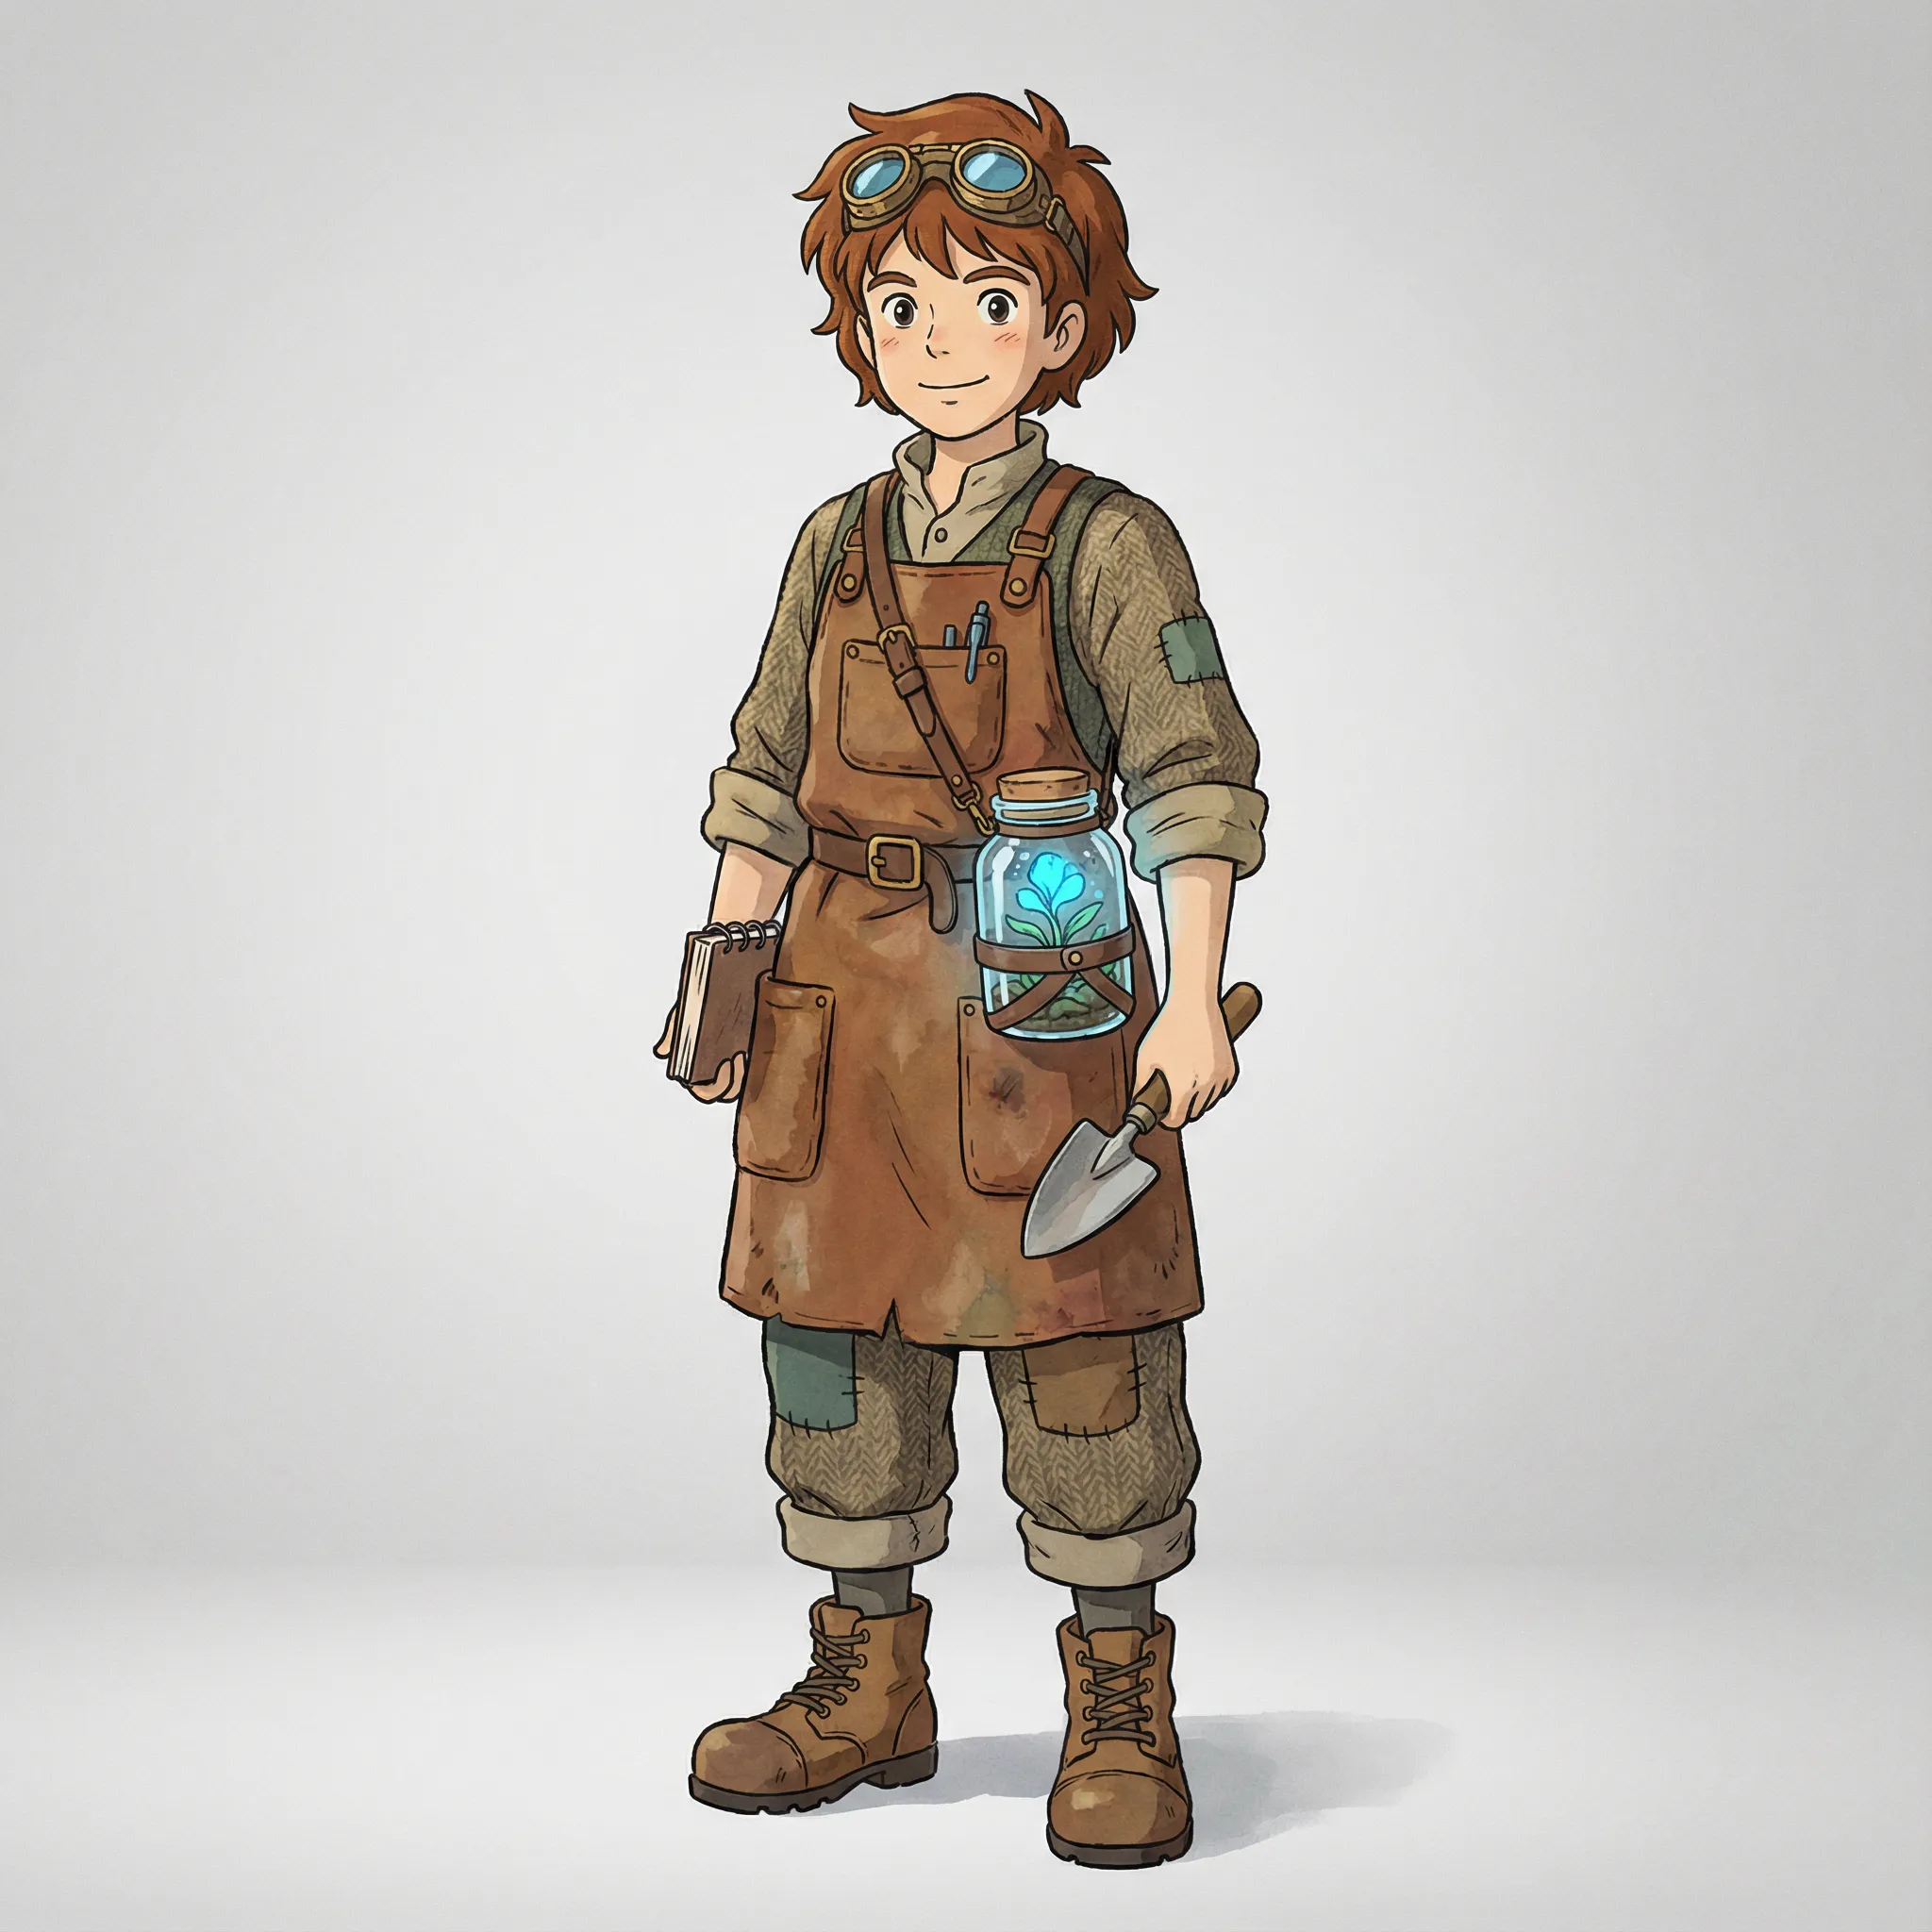
@Element1Explorer · frontal view
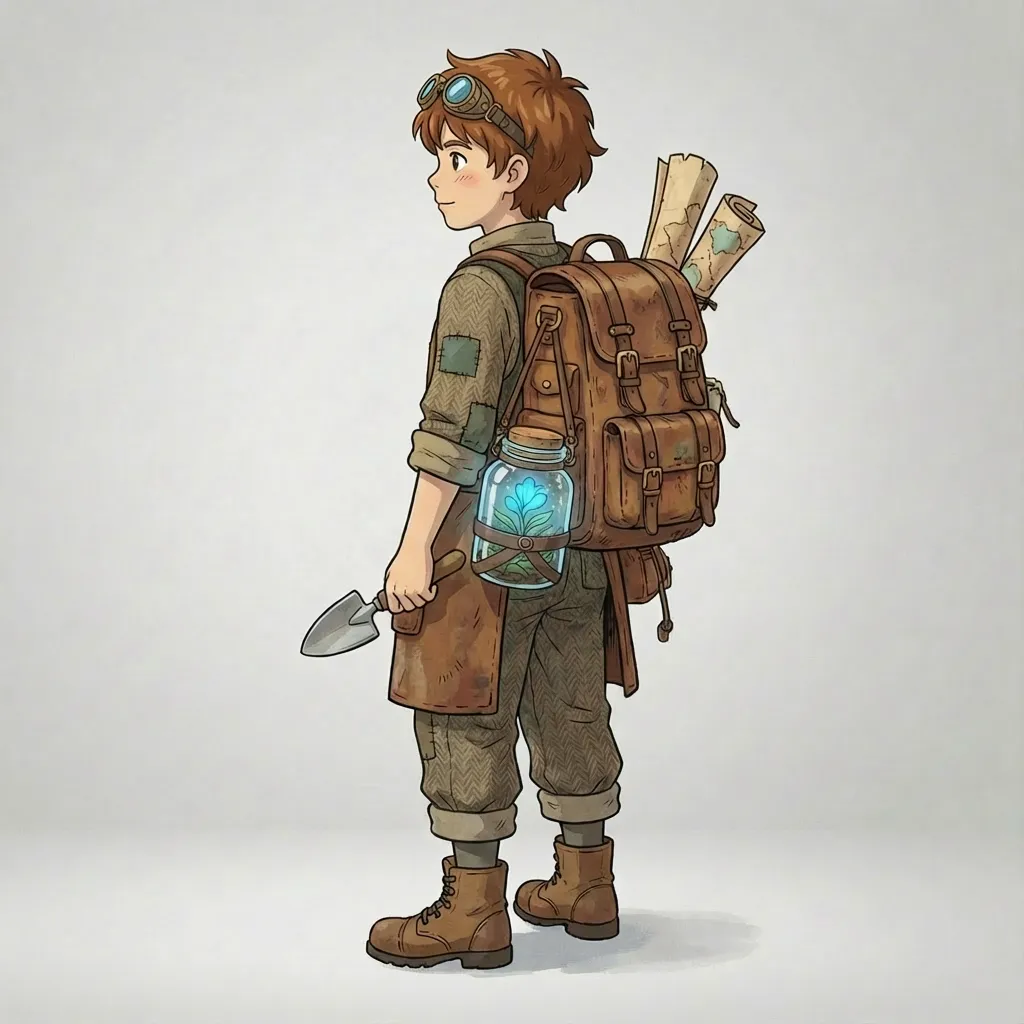
@Element1Explorer · side/back view
Use JPEG, PNG, or WebP images up to 50 MB each, with both dimensions at least 300 pixels and a width-to-height ratio of 0.4–2.5. Add the references as follows:
- Add the tropical bay to Background / Reference Images (Optional). As the first image in that field, it is referenced as
@Image1. - Expand Element Assets (Optional).
- Add the explorer's frontal view to Element Frontal Image.
- Add the explorer's side/back view to Element Reference Images. Together, these images define one character, referenced as
@Element1.
The side/back reference is useful because the source person faces away from the camera. Use it to describe the explorer's backpack and silhouette while the frontal view supplies appearance and clothing details.
Background references and element images share a limit of four images in total. This example uses three. An element requires a frontal image and at least one supporting image. Its supporting image belongs to @Element1; it does not become @Image2 in the background-reference list.
3. Describe the background, character, and visual style
Prompts support up to 2,500 characters. For a similar park-walking clip, try this prompt and adjust it to your footage:
Edit @Video1: replace the person with the young explorer defined by
@Element1, and replace the park with the tropical bay in @Image1.
Use a consistent hand-drawn animation look for both the character and
the environment, with soft painted colors and clear linework.
Keep the original walking direction, pace, shot timing, framing,
and camera movement. Show the explorer walking away from the camera
toward the bay. Keep his goggles, clothes, backpack, and equipment
consistent with the element references. Match his scale, perspective,
lighting, and contact shadows to the island setting.
Give each input a clear job: @Video1 supplies the movement and shot structure, @Image1 guides the bay and overall palette, and @Element1 guides the explorer. Asking for a shared visual style helps describe how the character and setting should fit together. Generated edits may still reinterpret motion, objects, and details.
| Reference | Meaning in this example |
|---|---|
@Video1 | The original park-walking video |
@Image1 | The illustrated tropical bay background |
@Element1 | The explorer defined by frontal and side/back views |
For your own edit, name what should change, identify the reference for each change, and say which actions or camera details should remain. Mention lighting, perspective, and visual style where they matter.
The workspace's prompt shortcuts are editable starting points. Replace any [bracketed description] before generating. Only mention image and element markers that correspond to uploaded assets.
4. Select a mode, review the settings, and generate
Choose Fast or Advanced under Mode. If your source has audio you want to retain, review Keep Original Sound. The two example clips here are silent.
Before generating, review the selected mode and current credit estimate in the workspace. See Pricing for subscriptions and credit packs.
Once the video and three images have uploaded, start generation. Watch the whole result: check walking continuity, the backpack and equipment, character outlines, foot contact, and how the illustrated character fits the bay. Download the version you want to keep.
Try changing only the background or character
To keep the original person and change the setting, upload the video and bay image, then try:
Change only the background in @Video1 to the tropical bay guided by
@Image1. Keep the original person's appearance, clothes, walking
direction and pace, shot timing, framing, and camera movement.
Match the new setting's perspective, lighting, and contact shadows
to the person. Keep the character unchanged.
This version does not need explorer element images. Without a background reference, you can describe the setting in text instead:
Change only the background in @Video1 to a tropical island bay with
palm trees, turquoise water, a sandy shore, a wooden boat, and distant
hills. Keep the original person's appearance and actions, shot timing,
framing, and camera movement. Match the setting's perspective,
lighting, and contact shadows to the person.
To replace only the person with the explorer while retaining the park, upload the two explorer views and try:
In @Video1, replace the person with the illustrated explorer defined
by @Element1. Keep the park background, walking direction and pace,
shot timing, framing, and camera movement. Show the explorer from
behind as he walks away. Keep his goggles, clothes, backpack, and
equipment consistent with the references. Match his scale and foot
contact to the original scene while preserving his illustrated look.
The last version intentionally places an illustrated character in the original park. For an illustrated scene throughout, use the combined prompt above. When refining a result, change one clear instruction at a time so you can judge its effect.
Common questions
Do I need all three reference images for every edit?
No. Start with a video and a prompt. Add a background reference for a specific setting, and element images to guide a character's appearance. This combined example uses one background and two views of the same character.
Why use both frontal and side/back views?
They describe different visible details of one character. The frontal view shows the face and outfit; the side/back view shows the backpack and silhouette relevant to this rear-facing walk. Neither image is a separate character.
Will the result exactly match these images and movements?
References guide a generated edit. Character details, geometry, movement, and lighting can change. Check the full clip rather than judging only the first frame.
Can I export a transparent character here?
Use Video BG Remover for a transparent cutout. Video BG Changer & Editor generates an edited scene.
Make your next edit
Prepare your source video, choose the environment and character references, and describe the changes in Video BG Changer & Editor. Keep the reference markers matched to your uploaded files and review the whole result before using it.